Using the LCD Projector & Laptop
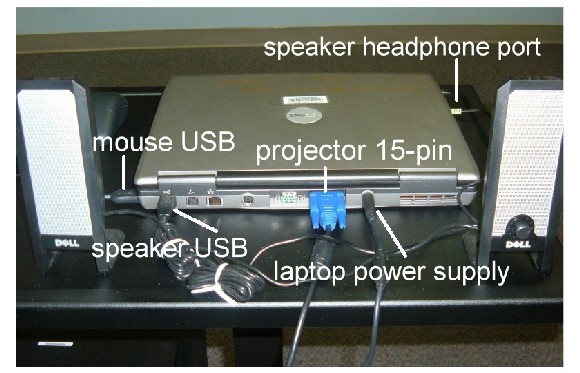
Make sure all of your equipment is connected.
*Remember, some equipment may vary.
 |
|
 |
_ _ _ _ _ _ _ _ _ _ _ _ _ _ _ _ _ _ _ _ _ _ _ _ _ _ _ _ _ _ _ _ _ _ _ _ _ _ _ _ _ _ _ _ _ _ _ _
Step 1:
Turn on the laptop & log on.
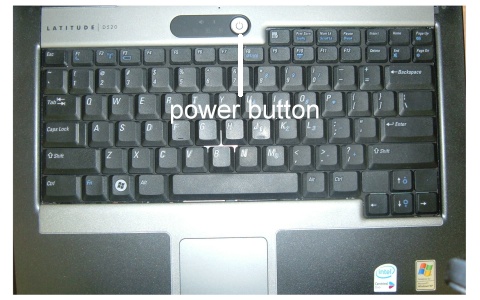 |
 The power button may be in a different location than that shown here; however, it will most likely have this symbol on or near it. |
_ _ _ _ _ _ _ _ _ _ _ _ _ _ _ _ _ _ _ _ _ _ _ _ _ _ _ _ _ _ _ _ _ _ _ _ _ _ _ _ _ _ _ _ _ _ _ _
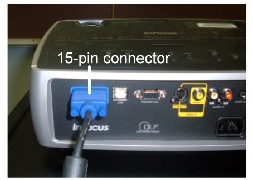
Step 2:
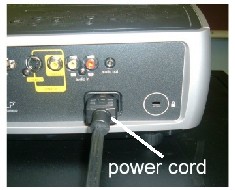
Turn on the projector.
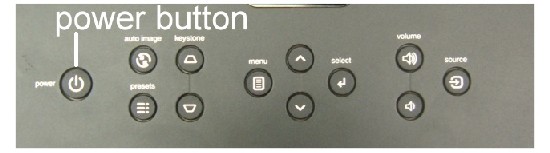 |
The power button may be located on the top, side, or back of the projector. It will most likely have the above symbol if it is not otherwise labeled. |
| The
projector will take a few moments to warm up. A blank projection will most likely be shown. |
|
| *Note: To TURN OFF many projectors, you may need to press the power button twice. (Once to initiate the action, then a second time to confirm the action.) | |
_ _ _ _ _ _ _ _ _ _ _ _ _ _ _ _ _ _ _ _ _ _ _ _ _ _ _ _ _ _ _ _ _ _ _ _ _ _ _ _ _ _ _ _ _ _ _ _
Step 3:
On the laptop, open the program, file, or website that you will present to the class.
It will not yet be showing on the screen.
_ _ _ _ _ _ _ _ _ _ _ _ _ _ _ _ _ _ _ _ _ _ _ _ _ _ _ _ _ _ _ _ _ _ _ _ _ _ _ _ _ _ _ _ _ _ _ _
Step 4:
Coordinate the laptop & projector displays.
| There are three typical display modes when using a projector. |
|
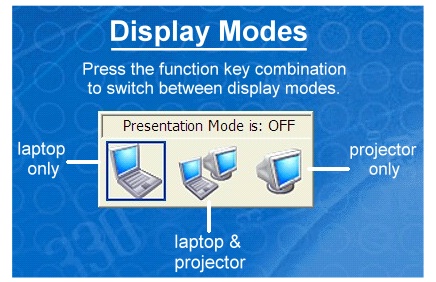 | Laptops will typically have a function key combination which allows you to switch between the various display modes. This key combination can vary between laptops. All you should have to do is press this key combination until you are in the desired display mode. For example, if you want to view the same image on both the laptop and projector at the same time, but your laptop screen is blank, press the function key combination until the image is displayed on both the laptop and projector. | ||
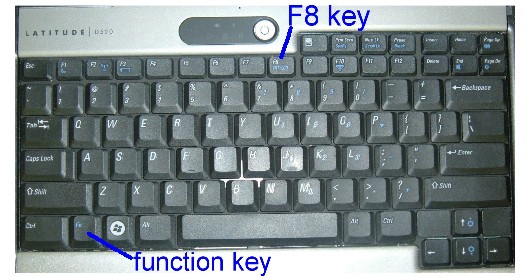 |
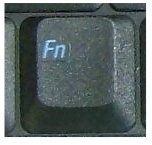 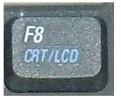 On a Dell laptop press fn + F8 simulataniously to switch between the three display modes. |
||
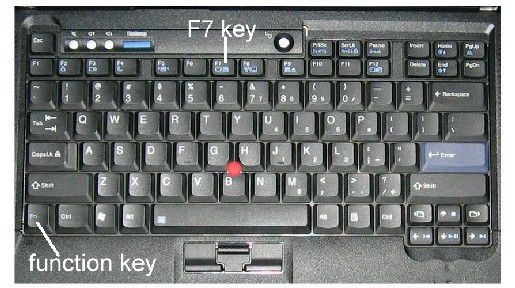 |
 On a Thinkpad laptop press fn + F7 simultaniously to switch between the display modes. |
||
| Some other laptops may
have different function key combinations to toggle the LCD/computer display
modes. Look for the symbols found on the F8 & F7 keys pictured above, or read your owner's manual. Some newer laptops may even detect the LCD projector automatically. |
|||
_ _ _ _ _ _ _ _ _ _ _ _ _ _ _ _ _ _ _ _ _ _ _ _ _ _ _ _ _ _ _ _ _ _ _ _ _ _ _ _ _ _ _ _ _ _ _ _
Step 5:
Align the projection with the screen.
|
|
|
| Video Instructions |
_ _ _ _ _ _ _ _ _ _ _ _ _ _ _ _ _ _ _ _ _ _ _ _ _ _ _ _ _ _ _ _ _ _ _ _ _ _ _ _ _ _ _ _ _ _ _ _
Step 6:
Explore the possibilities that an LCD projector and laptop can bring to your classroom.
You can:
|
_ _ _ _ _ _ _ _ _ _ _ _ _ _ _ _ _ _ _ _ _ _ _ _ _ _ _ _ _ _ _ _ _ _ _ _ _ _ _ _ _ _ _ _ _ _ _ _